Introducing the Practical
This involves setting up an electrolysis to investigate the effect of changing the current on the mass of the copper electrodes used in the electrolysis of copper sulfate solution.
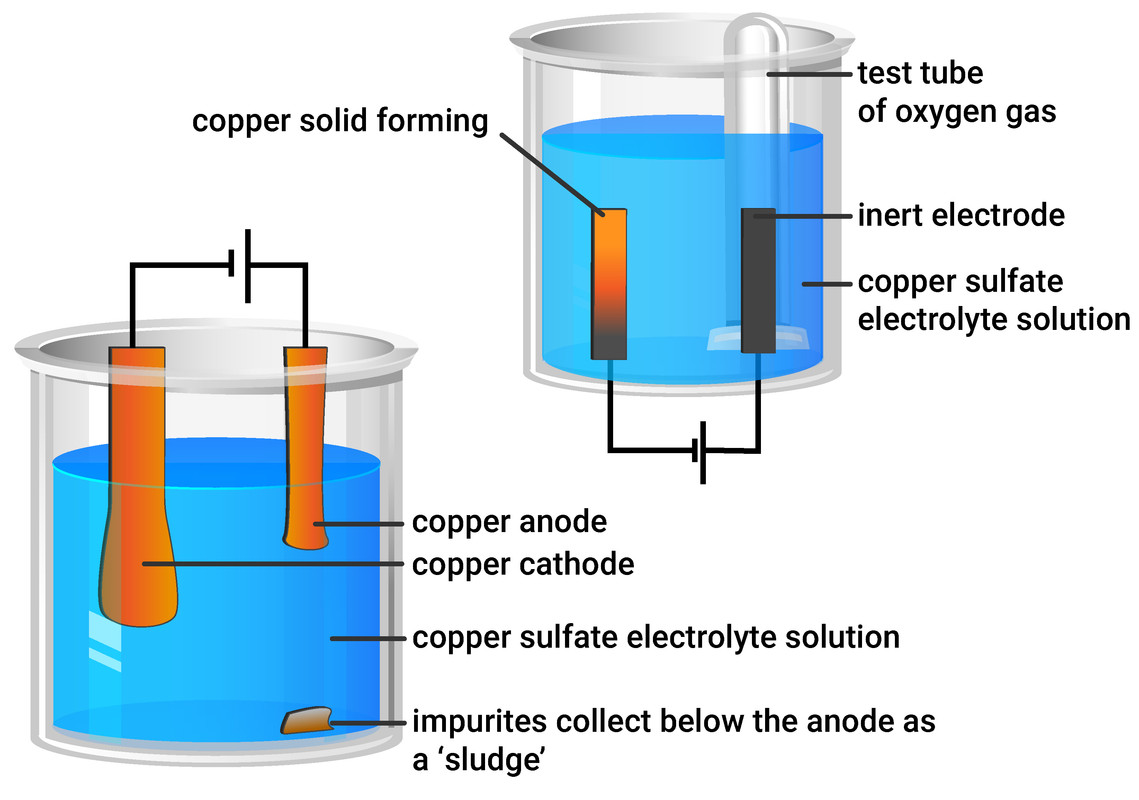
The second part of this investigation covers the products formed during the electrolysis of copper sulfate solution using inert (graphite) electrodes.
Quantitative analysis when using copper electrodes will be expected.
Risk Asessment
As a general rule, eye protection (goggles) must be worn for all practicals.
| hazard | possible harm | precaution |
|---|---|---|
| copper sulfate solution |
skin and serious eye irritation |
wear gloves |
| DC electric supply |
electric shock |
switch off apparatus before touching, ensure electrodes do not ever touch |
This risk assessment is provided as an example only, and you must perform your own risk assessment before doing this experiment.
Apparatus
Each group will need:
low voltage supply (0‐12 V)
ammeter (0‐1 A)
variable resistor
connecting leads
crocodile clips
100 ml beaker
stop watch
2 graphite rods
strips of copper foil
copper sulfate solution
access to a balance (at least 2 d.p.)
Experiment Set-up

Method
Part 1 - Investigation using inert electrodes
- use a measuring cylinder to add 40 ml of copper sulfate solution into a beaker
- place two graphite rods into the copper sulfate solution - attaching one electrode to the negative terminal of a dc supply, and the other electrode to the positive terminal
- fill a small test tube with copper sulfate solution and position over the positive electrode (anode) - as shown in the diagram above
- turn on the power supply and observe what happens at each electrode
- test any gas produced with a glowing splint
- record your observations and the results of your tests
Part 2 - Investigation using copper electrodes
- use a measuring cylinder to add 40 ml of copper sulfate solution into a beaker
- measure and record the masses of two pieces of copper foil, labelling one the anode, and one the cathode
- attaching the cathode to the negative terminal of a dc supply, and the anode to the positive terminal
- turn on the power supply, adjust the power supply to achieve a constant current as directed by your teacher, and observe what happens at each electrode
- after 10 minutes, turn off the power
- carefully remove the electrodes and allow all the liquid to evaporate - do not wipe the electrodes clean
- measure and record the mass of the electrode
- repeat the experiment again with new electrodes, and different currents
Results and Analysis
Part 1 - Investigation using inert electrodes
| negative electrode | positive electrode | |
|---|---|---|
| observation | orange-brown solid forms | bubbles of gas produced |
| test for gas | gas relights a glowing splint |
- copper metal is formed at the negative electrode
- oxygen gas is formed at the positive electrode
Part 2 - Investigation using copper electrodes
| current (A) | cathode mass at start (g) | cathode mass at end (g) | mass change (g) |
|---|---|---|---|
| current (A) | mass of anode at start (g) | mass of anode at end (g) | mass change (g) |
|---|---|---|---|
Calculate the change in mass of each electrode, and then plot a graph to show how the current affected the change in mass
- change in mass plotted on the Y axis (vertical)
- current plotted on the X axis (horizontal)
As the current is increased the change in mass of the electrodes becomes greater.
Exam Question and Model Answer
A student conducts an investigation to find out what is produced during the electrolysis of sodium sulfate.
Describe how the student could carry out an investigation, and show (using ions) what is given off at each electrode.
[6 marks]
Level 1 (1-2 marks)
Add sodium sulfate solution to a beaker, and connect two electrodes to a power supply.
Completely fill two small test tubes with sodium sulfate solution and position a test tube over each electrode, then turn on the power supply and observe what happens at each electrode.
hydrogen gas will form at the negative electrode
oxygen gas will form at the positive electrode
Level 2 (3-4 marks)
Wearing safety glasses, add sodium sulfate solution to a beaker, and connect two inert electrodes (make sure they do not touch) to a power supply.
Completely fill two small test tubes with sodium sulfate solution and position a test tube over each electrode, then turn on the power supply and observe what happens at each electrode.
Any gases produced can be collected in the test tubes and tested (squeaky pop test - hydrogen, relight a glowing splint - oxygen).
hydrogen gas will form at the negative electrode
oxygen gas will form at the positive electrode
Level 3 (5-6 marks)
Wearing safety glasses, add sodium sulfate solution to a beaker, and connect two inert electrodes (make sure they do not touch) to a power supply.
Completely fill two small test tubes with sodium sulfate solution and position a test tube over each
electrode, then turn on the power supply and observe what happens at each electrode.
Any gases produced can be collected in the test tubes and tested (squeaky pop test - hydrogen, relight a glowing splint - oxygen).
hydrogen gas will
form at the negative electrode: 2H+(aq) + 2e- → H2(g)
oxygen gas will form at the positive electrode: 4OH-(aq) → 2H2O(l) + O2(g) + 4e-


